こんにちは、テルプロです!
「shared_preferencesの使い方がわからない」とお悩みではないでしょうか?
テルプロ
本記事ではそんな悩みを解決していきます!
本記事を読むことで
- 「shared_preferences」の使い方をサンプルで理解できる
- コードを公開しているので、自分の環境で確かめることができる
shared_preferencesでメモアプリを作る
事前準備
パッケージをインストール
今回使用するパッケージは以下の通りです。
dependencies:
  flutter:
    sdk: flutter
  shared_preferences: ^2.0.13

dev_dependencies:
  flutter_lints: ^1.0.0
  flutter_test:
    sdk: flutter
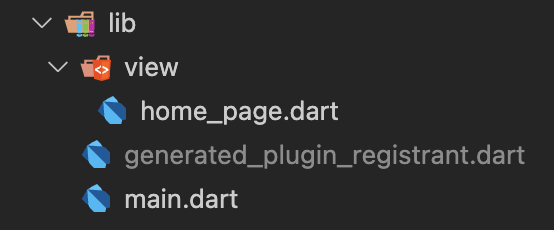
プロジェクト構成
リポジトリ構成
完成イメージ
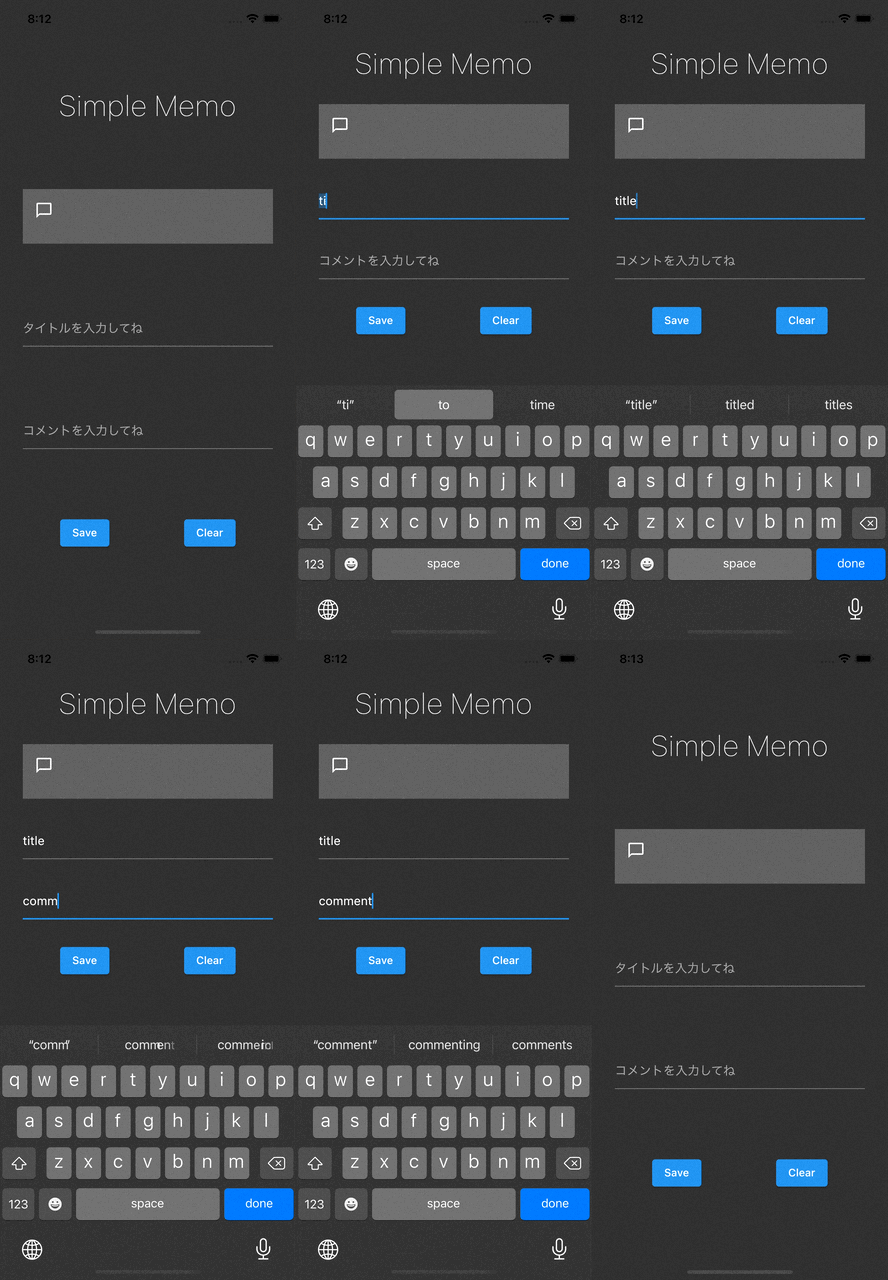
本アプリは1画面のみの構成になります。タイトルとコメントを入力して「Save」ボタンを押すと、入力されたデータがローカルに保存されます。
アプリ起動時にデータの読み込みを行うことで、保存された「タイトル」「コメント」「アイコン」が表示されます。
「Clear」ボタンを押すと、保存されたデータは完全に削除されます。
ソースコード
main.dart
import 'package:flutter/material.dart';
import 'package:flutter/services.dart';
import 'package:simple_memo/view/home_page.dart';

Future main() async {
  WidgetsFlutterBinding.ensureInitialized();
  await SystemChrome.setPreferredOrientations([
    DeviceOrientation.portraitUp,
    DeviceOrientation.portraitDown,
  ]);
  runApp(MyApp());
}

class MyApp extends StatelessWidget {
  static const String title = 'simple_memo';

  @override
  Widget build(BuildContext context) => MaterialApp(
        debugShowCheckedModeBanner: false,
        title: title,
        theme: ThemeData.dark(),
        home: const HomePage(),
      );
}
view / home_page.dart
import 'package:flutter/material.dart';
import 'package:shared_preferences/shared_preferences.dart';

// keyを用意
const titleKey = 'name';
const commentKey = 'comment';
const iconKey = 'icon';

class HomePage extends StatefulWidget {
  const HomePage({Key? key}) : super(key: key);
  @override
  State<HomePage> createState() => _HomePageState();
}

class _HomePageState extends State<HomePage> {
  final titleController = TextEditingController();
  final commentController = TextEditingController();
  String title = '';
  String comment = '';
  bool icon = false;

  @override
  void initState() {
    super.initState();
    init();
  }

  // アプリ起動時に保存したデータを読み込む
  void init() async {
    final prefs = await SharedPreferences.getInstance();
    setState(() {
      title = prefs.getString(titleKey)!;
      comment = prefs.getString(commentKey)!;
      icon = prefs.getBool(iconKey)!;
    });
  }

  @override
  Widget build(BuildContext context) {
    return GestureDetector(
      onTap: () => FocusScope.of(context).unfocus(),
      child: Scaffold(
        body: Padding(
          padding: const EdgeInsets.all(30.0),
          child: Column(
            mainAxisAlignment: MainAxisAlignment.spaceEvenly,
            children: [
              const Text(
                'Simple Memo',
                style: TextStyle(fontSize: 38.0, fontWeight: FontWeight.w100),
              ),
              ListTile(
                // 保存された場合のデータを表示する
                leading: icon == false
                    ? const Icon(Icons.chat_bubble_outline)
                    : const Icon(Icons.chat),
                tileColor: Colors.white24,
                title: Text(title),
                subtitle: Text(comment),
              ),
              TextField(
                controller: titleController,
                decoration: const InputDecoration(hintText: 'タイトルを入力してね'),
              ),
              TextField(
                controller: commentController,
                decoration: const InputDecoration(hintText: 'コメントを入力してね'),
              ),
              Row(
                mainAxisAlignment: MainAxisAlignment.spaceAround,
                children: [
                  ElevatedButton(
                    onPressed: () async {
                      final prefs = await SharedPreferences.getInstance();
                      // データを保存する
                      prefs.setString(titleKey, titleController.text);
                      prefs.setString(commentKey, commentController.text);
                      prefs.setBool(iconKey, true);
                      setState(() {
                        // データを読み込む
                        title = prefs.getString(titleKey)!;
                        comment = prefs.getString(commentKey)!;
                        prefs.setBool(iconKey, true);
                        if (title != '' && comment != '') {
                          icon = true;
                        }
                      });
                    },
                    child: const Text('Save'),
                  ),
                  ElevatedButton(
                    onPressed: () async {
                      final prefs = await SharedPreferences.getInstance();
                      setState(() {
                        // データを削除する
                        icon = false;
                        title = '';
                        titleController.text = '';
                        comment = '';
                        commentController.text = '';
                        prefs.remove(titleKey);
                        prefs.remove(commentKey);
                      });
                    },
                    child: const Text('Clear'),
                  ),
                ],
              ),
            ],
          ),
        ),
      ),
    );
  }
}
大変お疲れ様でした!以上でアプリは完成です!
今回ご紹介したアプリ全体のソースコードはこちらです。
よろしければ、ご参考にどうぞ。
GitHub:https://github.com/terupro/simple_memo
まとめ
今回は「shared_preferences」を用いたメモアプリの作り方をご紹介しました。
shared_preferencesを使えば、ローカルに簡単なデータを保存することができます。便利なパッケージなので、ぜひ使ってみてください。
▼以下では、私の実体験に基づいて「Flutterの効率的な勉強法」の具体的な手順を詳しく解説しています。よろしければ、ご参考にどうぞ!
最後までご覧いただきありがとうございました。ではまた!


